6 Steps to Sync ToolSwift Products to Google Merchant Center
September 24, 2025
Table of Content
Who is this for?
Step 1 — Create or select a Google Cloud project
Step 2 — Enable Content API for Shopping
Step 3 — Configure the OAuth consent screen
Step 4 — Create OAuth 2.0 credentials (Web application)
Step 5 — Get Merchant Information
Step 6 — Connect ToolSwift to Google Merchant Center
Conclusion
Having products on your B2B ecommerce platform alone isn't enough to sell online. Google Shopping is the largest product‑discovery surface on the web, letting you show your catalog to Google users in your region. To show your products on Google Shopping (Free listings and Shopping ads), connect your ToolSwift account to Google Merchant Center (GMC) using Google's Content API for Shopping. Don't stress—this guide walks you through every step, including how to get your Google OAuth Client ID and Client Secret from the Google Cloud Console, connect ToolSwift to your Merchant Center account, map your product data, and run your first sync.
Who is this for?
Step 1 — Create or select a Google Cloud project
Go to console.cloud.google.com
Sign in using the email with products
Click the project dropdown at the top navigation bar
Select an existing project or click New Project and follow the prompts

Step 2 — Enable Content API for Shopping
In the left sidebar, open APIs & Services → Library
Search for Content API for Shopping
Open it and click Enable
Step 3 — Configure the OAuth consent screen
In the left sidebar, open APIs & Services → OAuth consent screen
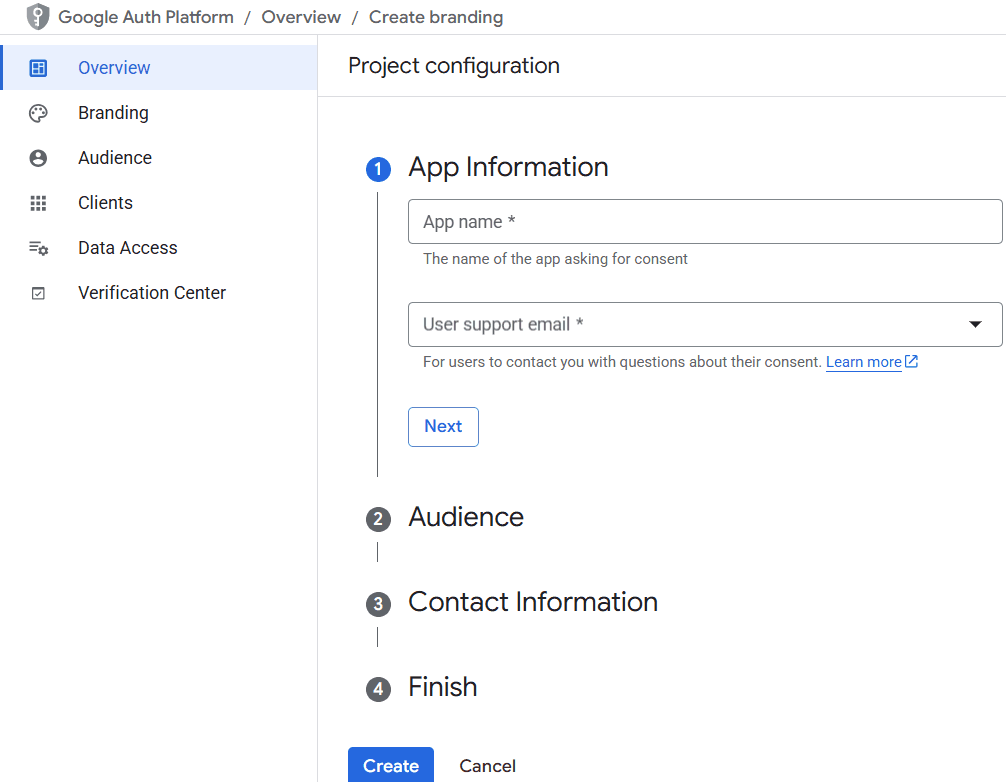
Click on Get Started and enter the App name and the User support email
Press Next to set the Audience to External
Add the Contact Information Email
Agree to the policy, click Continue, and Finish
In the left sidebar, go to Audience
In Test users, add the Google account(s) you'll use and save

Step 4 — Create OAuth 2.0 credentials (Web application)
Go to APIs & Services → Credentials
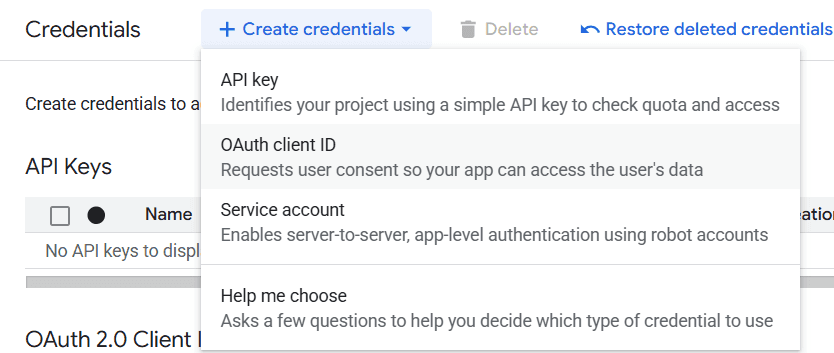
Click + Create credentials dropdown → OAuth client ID
Set Application type to Web application
Name it (e.g., ToolSwift Google Merchant App)
Under Authorized redirect URIs, add: https://app.toolswift.ca/google-merchant-center
Click Create and DON'T close the pop-up until you finish the next action
Copy the Client ID and Client Secret and store them securely

Step 5 — Get Merchant Information
Go to https://www.google.com/retail.
Click on the Sign in dropdown and choose Sign in to Merchant Center
At the top right, beside the Google Apps icon, click on the Merchant Center Account dropdown
Copy the Merchant ID and store it.

Step 6 — Connect ToolSwift to Google Merchant Center
Sign in to your account in https://app.toolswift.ca/
In the left-side menu, open Integrations → Google Merchant Center.
Add the Merchant ID and the Merchant Account Email and save
Paste your Client ID and Client Secret and save
Then click the Connect button
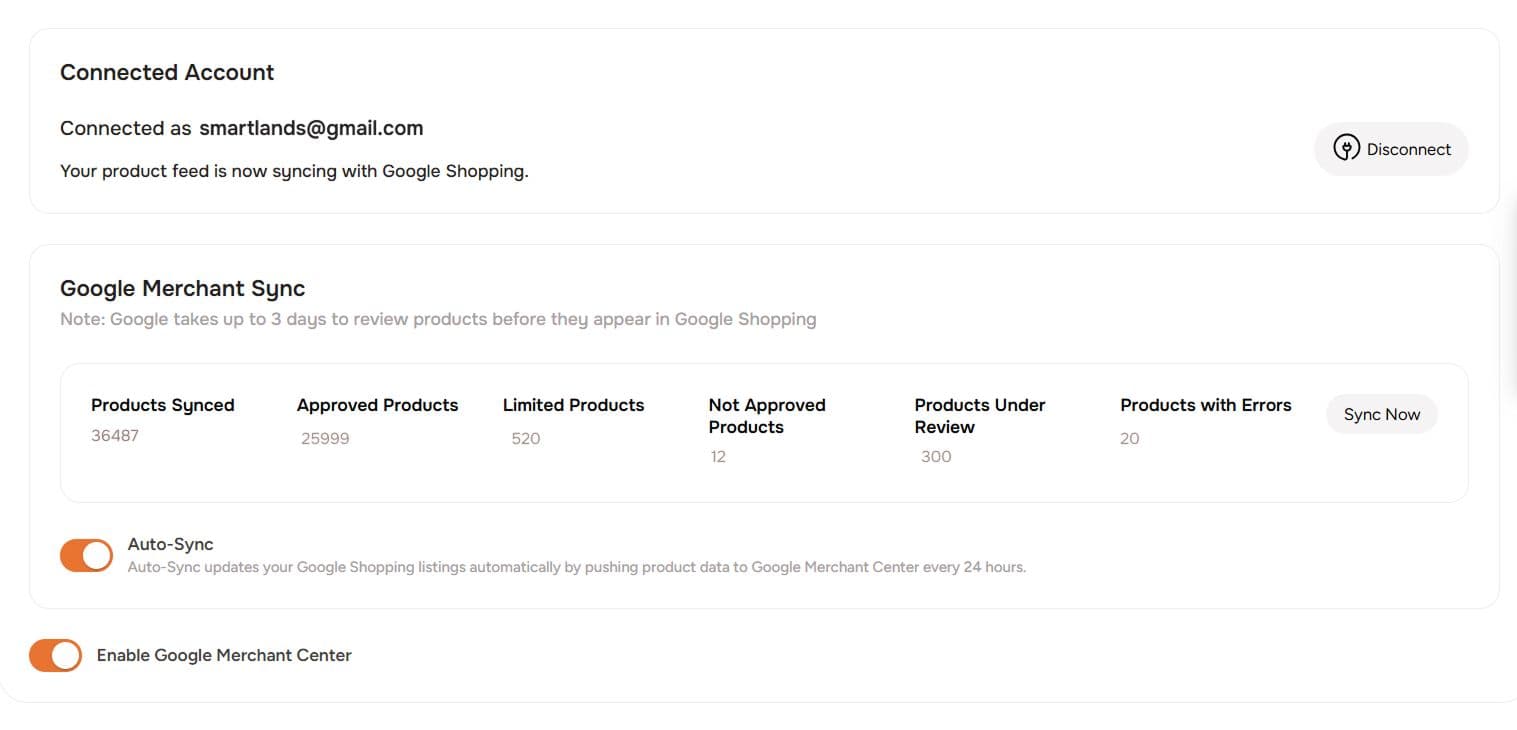
Below the Google Merchant Sync, allow the toggles: "Auto-Sync" and "Enable Google Merchant Center"
Note: The 2-row Google Merchant Sync table will appear, showing the status of the products in GMC.


