Integration, Documentation, B2B Payments, Stripe Payment, Apple Pay, Google Pay
How to Enable Apple Pay and Google Pay on ToolSwift Using Stripe
October 9, 2025
Enabling Apple Pay and Google Pay helps customers complete checkout faster by using saved payment details on their devices. When connected through Stripe, these digital wallets improve conversion rates for B2B eCommerce businesses while maintaining secure payment processing for your store. This guide walks ToolSwift admins through enabling Apple Pay and Google Pay for your ToolSwift storefront using Stripe.
What You Need Before You Start
When enabled through Stripe, these digital wallets improve security, shorten checkout time, and support a smoother payment experience across devices.
Before enabling Apple Pay and Google Pay, make sure you have:
Access to your Stripe Dashboard
Your store’s website domain
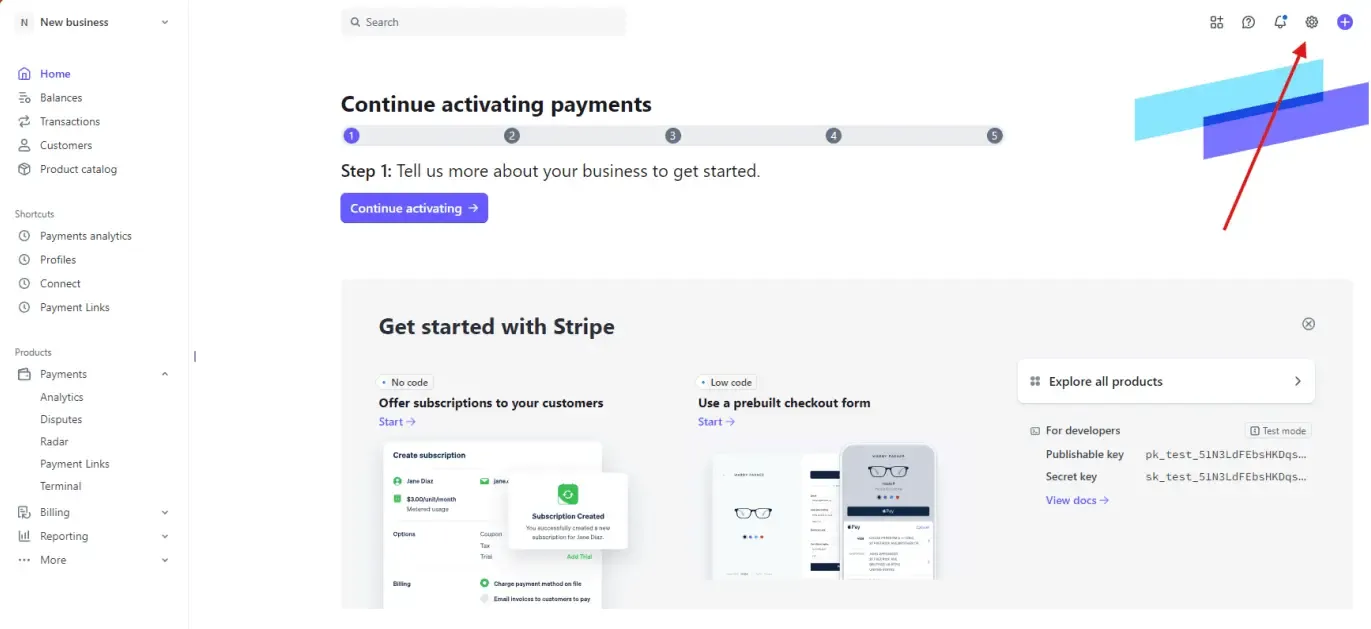
Step 1: Access Stripe Settings
- Log in to your Stripe Dashboard at https://dashboard.stripe.com
- Click the Settings icon (gear) in the top-right corner
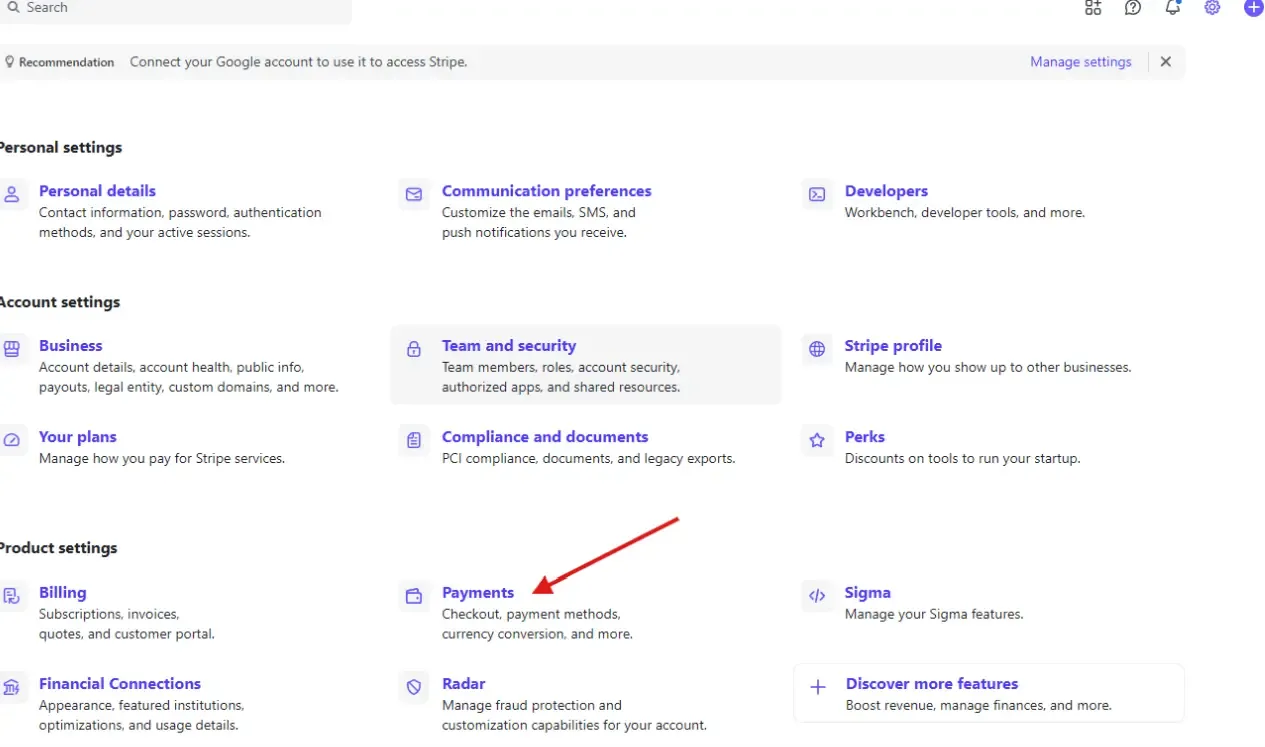
Step 2: Open Payment Settings
- Scroll to Product settings
- Select Payments
This is where Stripe manages all available payment methods for your account.
Step 3: Enable Apple Pay and Google Pay in Stripe
- In the Payments section, click on the Payment methods tab
- Locate Apple Pay in the list and ensure it shows Enabled
- Locate Google Pay in the list and ensure it shows Enabled
- If either shows Disabled, click into it and enable it
Once enabled, Stripe allows these wallets to appear during checkout when the requirements are met.

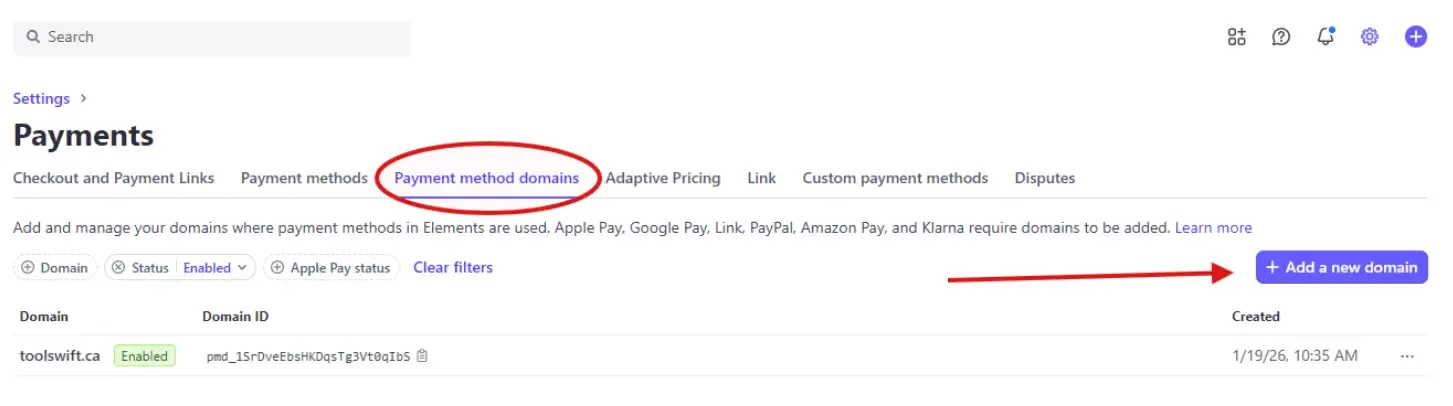
Step 4: Add Your Website Domain to Stripe
Apple Pay and Google Pay require domain verification to ensure payments are authorized for your website.
- Still under Payments, click the Payment method domains tab
- Click + Add a new domain
- Enter your store’s website domain (e.g., example.com)
- Click Save
If you need help adding your domain, ToolSwift support can assist with this step.
Step 5: Test Your Apple Pay and Google Pay Setup
After setup is complete, verify that the payment methods appear correctly at checkout.
Apple Pay Testing
Use Safari on an iPhone, iPad, or Mac
The Apple Pay button should appear during checkout
Google Pay Testing
Use Google Chrome
The Google Pay button should appear during checkout
If the buttons do not appear, confirm:
- The payment method is enabled in Stripe
- Your domain is added and verified
- You are using a supported browser and device
Conclusion
Congratulations! You've successfully connected Apple Pay and Google Pay to your ToolSwift account using Stripe. Now, you can offer these payment methods without added complexity, keeping payments scalable and straightforward as their business grows.
If you need further assistance, feel free to contact the ToolSwift support team. We would be more than glad to help!

